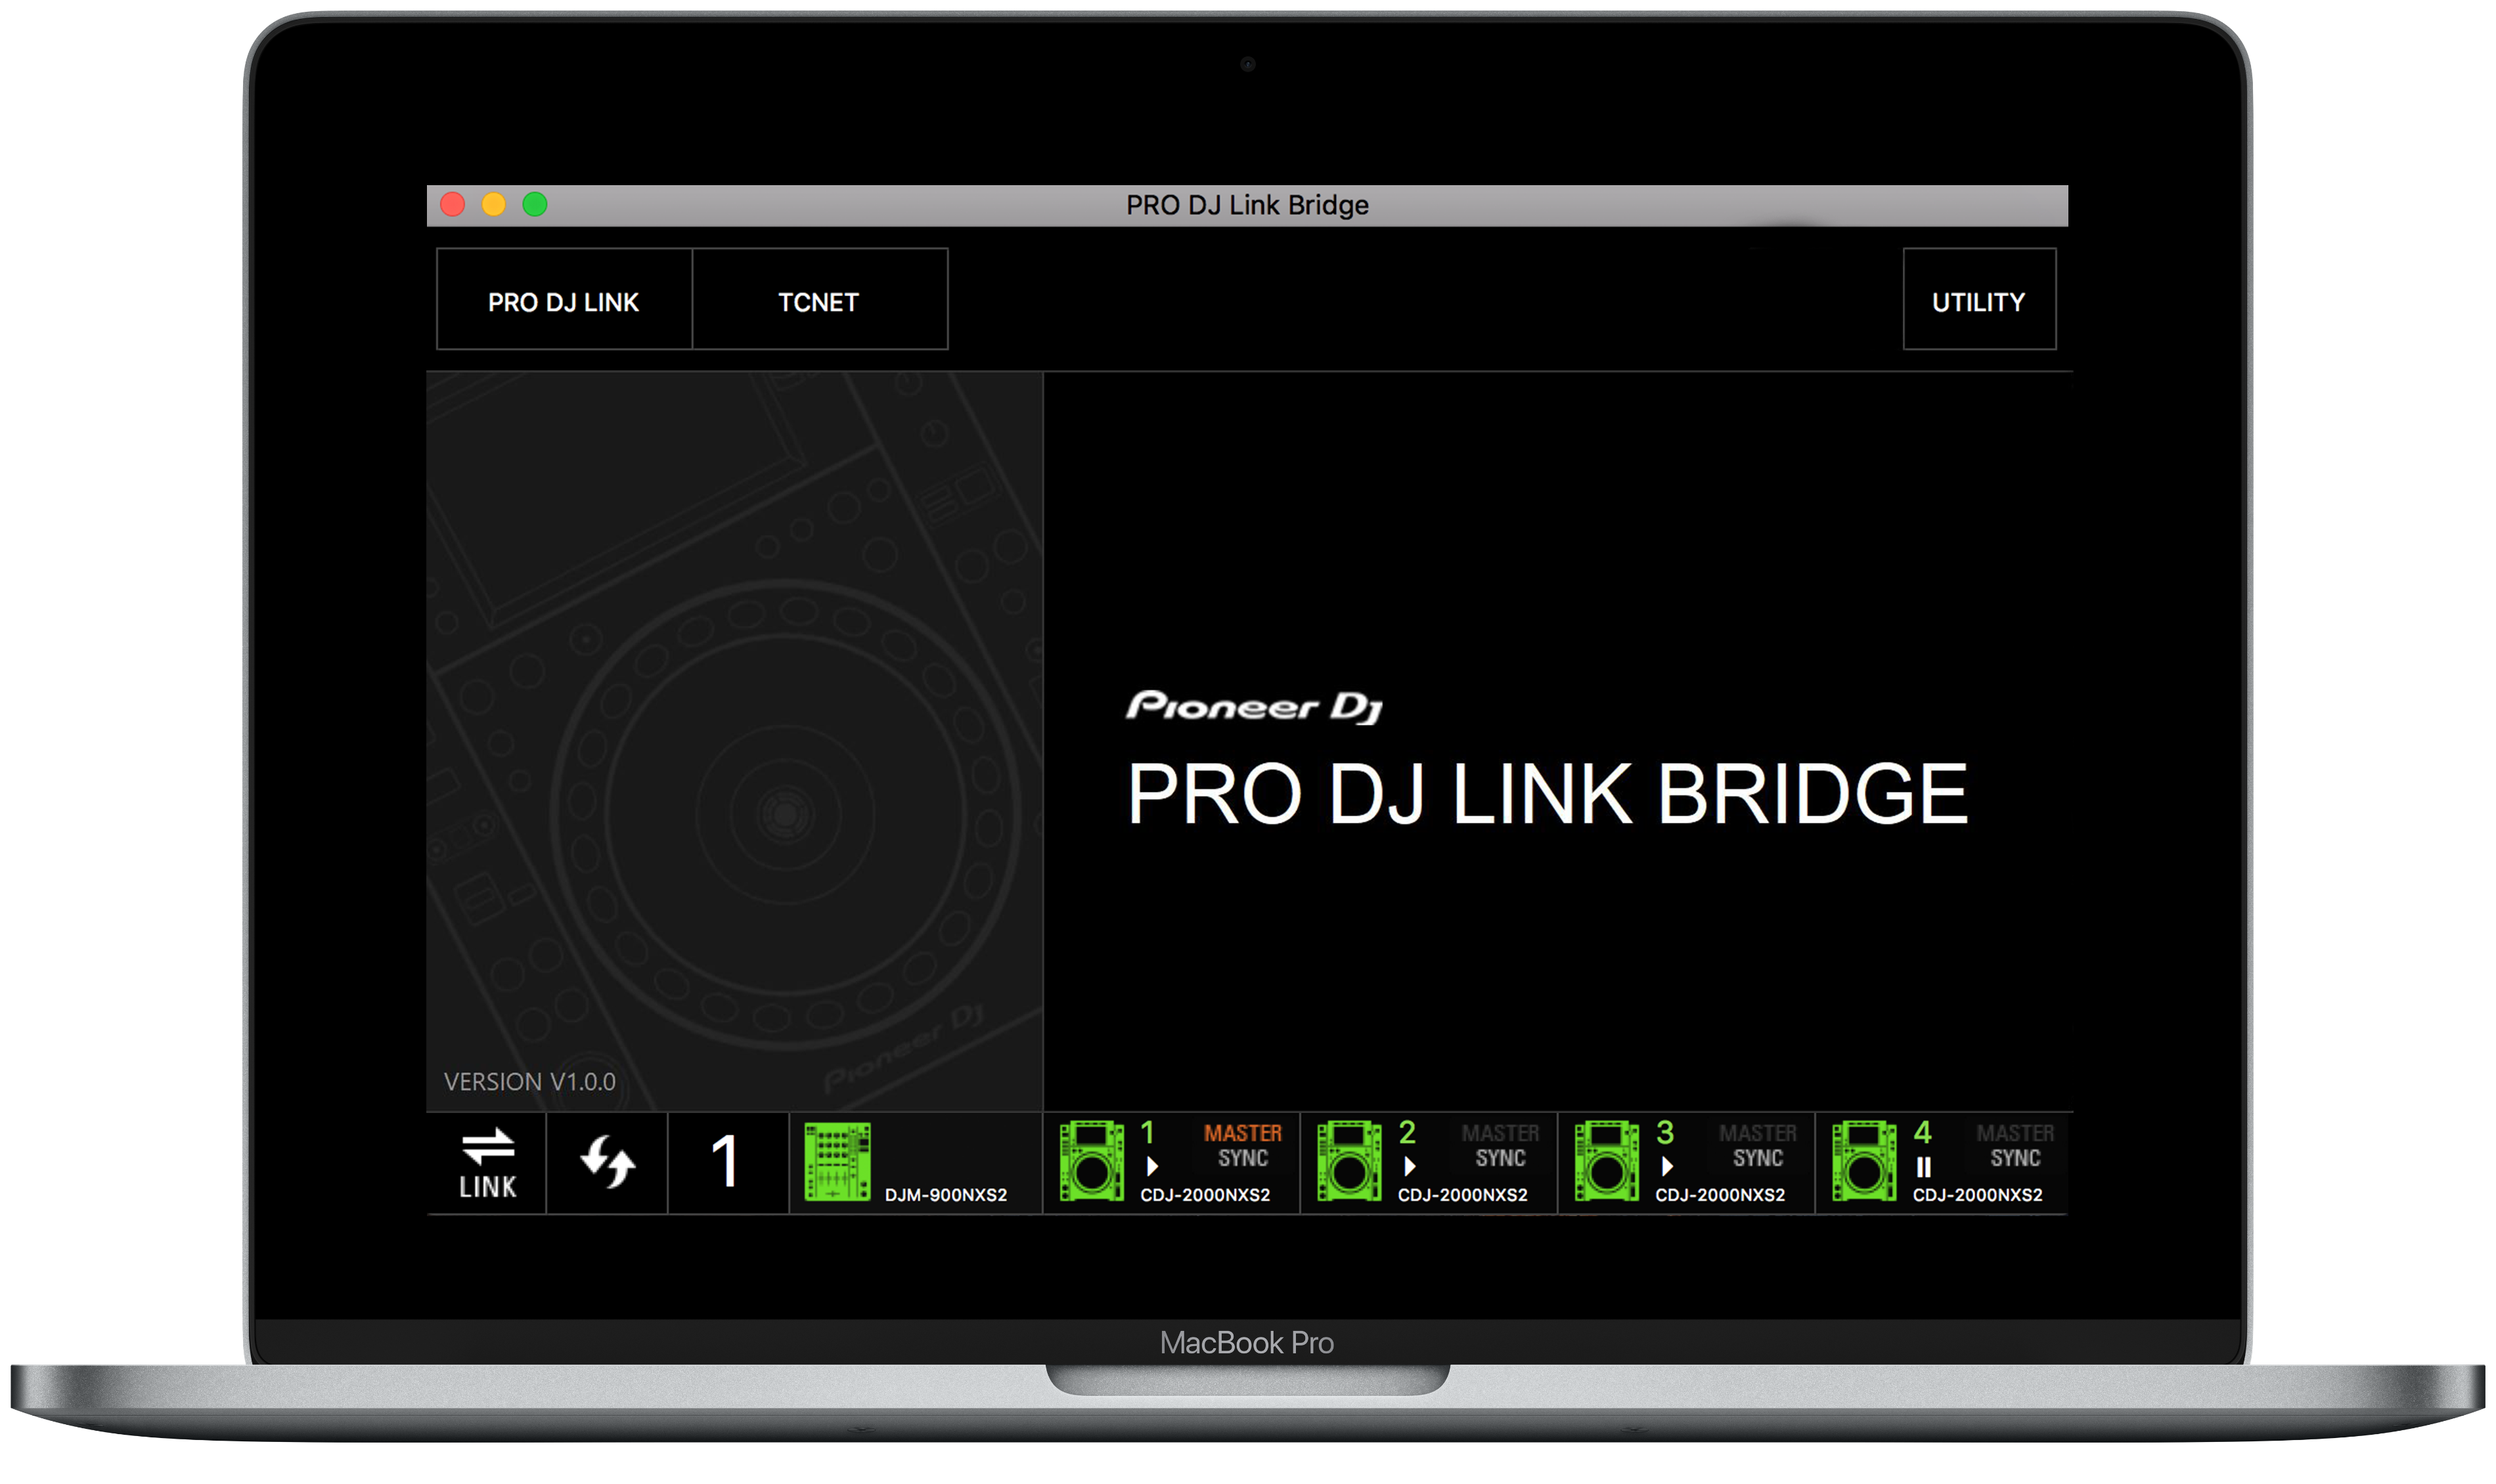
PRO DJ LINK Bridge is a free application from AlphaTheta that connects SoundSwitch directly to your standalone AlphaTheta hardware, no laptop DJ software required. This article introduces the integration, walks you through connecting SoundSwitch with PRO DJ LINK Bridge, and covers common troubleshooting steps.
Video Tutorial:
To help you get started, we recommend watching our video tutorial, which provides a visual guide on how to set up SoundSwitch with PRO DJ LINK Bridge. You can find the video here:
Supported Hardware
PRO DJ LINK Bridge officially supports the following AlphaTheta hardware:
- CDJ-3000X
- CDJ-1500X
- CDJ-3000
- CDJ-2000NXS2
- DJM-A9
- DJM-V10/LF
- DJM-900NXS2
Source: AlphaTheta PRO DJ LINK Bridge product page. Worth checking this list against AlphaTheta's page periodically in case it's updated.
Download Links
- PRO DJ LINK Bridge for Mac
- PRO DJ LINK Bridge for Windows
- PRO DJ LINK Bridge product page : AlphaTheta
- Downloading SoundSwitch
Requirements
- PRO DJ LINK Bridge software installed (free, from AlphaTheta)
- An Ethernet switch with enough ports for your hardware, plus one spare port for your laptop
- SoundSwitch installed, with your venue and fixtures already patched (see: Getting Started in Edit Mode)
- A supported SoundSwitch DMX interface: Control One, the SoundSwitch Micro DMX Interface, or a supported third party interface
Setting Up SoundSwitch with PRO DJ LINK Bridge
Step 1: Set Your Input to Rekordbox
In SoundSwitch, set your Input to Rekordbox under the General preferences. This displays your Rekordbox library inside SoundSwitch, the same library you'll use to export tracks to your USB drive for performance on your standalone hardware.
Step 2: Connect Your Hardware
Make sure your PRO DJ LINK Bridge software is downloaded and installed on the machine you'll be using. Connect your AlphaTheta hardware to that machine via Ethernet.
If you're using multiple units, for example a CDJ and DJM combo, you'll need an Ethernet switch to connect all your hardware together, the same way you would for sharing tracks across devices with PRO DJ LINK.
Step 3: Confirm Your Hardware is Connected
Once everything is connected, confirm the connection inside the PRO DJ LINK Bridge software. Connected hardware shows with a green indicator. If a device shows grey or orange, the connection between PRO DJ LINK Bridge and that unit hasn't been established yet.
If your hardware is connected correctly but isn't appearing in the Bridge software, check the following:
- Under the PRO DJ LINK tab, confirm the Interface setting is correct. This needs to match the network interface your hardware is actually connected through, whether that's a built in Ethernet port or a USB to Ethernet adapte
- Once set correctly, your devices should appear at the bottom of the Bridge application, showing green alongside their device names
- Make the same interface selection on the TCNet tab too, this ensures data from your devices reaches the SoundSwitch application correctly
Step 4: Connect SoundSwitch to the Bridge
With PRO DJ LINK Bridge running and your devices connected, open SoundSwitch and navigate to Performance Mode.
In the top left, select the Source Selection dropdown and choose PRO DJ LINK. Enable the toggle to start the connection, SoundSwitch will automatically attempt to find the Bridge application on the same network and connect.
Step 5: Connect Your DMX Hardware
Connect your supported SoundSwitch DMX interface, such as the Control One, to the computer running SoundSwitch, then connect your DMX cables to your fixtures.
Step 6: Test Your Connection
Once connected, load a track on your hardware. SoundSwitch automatically begins playback of the lighting, either your scripted track if one exists, or Autoloops for unscripted tracks. From here you have full access to SoundSwitch's features during your performance, including Performance Overrides, Static Looks, and Autoloops.
Troubleshooting
If SoundSwitch doesn't connect to PRO DJ LINK Bridge (the toggle doesn't switch to the connected state):
- Confirm the PRO DJ LINK Bridge application is running
- Confirm your devices are showing as connected (green) in the Bridge software, as covered in Step 3 above
- Some computers may require Wi-Fi to be temporarily disabled to establish a connection
If the above doesn't resolve the issue, SoundSwitch includes preferences to manually select the network interface used for the PRO DJ LINK connection:
- Navigate to the SoundSwitch preferences, and under the General tab you'll find PRO DJ LINK Bridge settings
- Toggle this to manual, then use the dropdown to select the network interface being used for the Bridge application
This manual workflow is particularly useful when running SoundSwitch and PRO DJ LINK Bridge on separate machines, letting you manually define the network interface of the device running the Bridge application if SoundSwitch can't detect it automatically.
Need Help?
If you encounter any issues while setting up SoundSwitch with PRO DJ LINK Bridge, our support team is here to assist you. Please visit the support home page and click 'Contact Support'.
Was this article helpful?
That’s Great!
Thank you for your feedback
Sorry! We couldn't be helpful
Thank you for your feedback
Feedback sent
We appreciate your effort and will try to fix the article